
Blog > Buying Guides > Outdoor Lighting Guide
How to Layer Outdoor Lighting Like a Designer
July 7th 2026 | 20 Minute read
Still need help?
Phone Monday to Friday, 9 AM to 8 PM ET. Chat 7 days a week.
Blog > Buying Guides > Outdoor Lighting Guide
July 7th 2026 | 20 Minute read
Phone Monday to Friday, 9 AM to 8 PM ET. Chat 7 days a week.
Most outdoor lighting schemes have one layer. A single wall light at the entrance, a floodlight above the garage, perhaps a few path lights scattered along the driveway. Each fixture serves a purpose in isolation, but they do not add up to anything. The exterior looks lit rather than designed, functional rather than considered, and after dark it fails to deliver the atmosphere that the investment in the home itself deserves.
Professional outdoor lighting designers approach the same exterior differently. They think in layers: distinct categories of light, each serving a specific purpose, each positioned to work in relationship with the others. The result is not more light but better light, and a home that looks as intentional after dark as it does in daylight.
This guide introduces the framework those designers use and shows how to apply it to every area of the exterior, from the front entrance to the pool edge.
For visual inspiration on what layered outdoor lighting looks like across real homes, browse our outdoor lighting ideas for modern homes before working through the layering principles below. When you are ready to explore fixtures, view the MOD outdoor lighting collection.
Use this table as a quick reference before reading the full guide. Each layer has a distinct role, and the most successful outdoor schemes include all four.
| Lighting Layer | Purpose | Typical Fixtures | Example Location |
|---|---|---|---|
| Arrival Lighting | Signal the entrance; create a welcoming first impression | Wall sconces, lantern posts, overhead pendants | Front door, gate, driveway entry |
| Navigation Lighting | Guide safe movement through outdoor areas | Path lights, step lights, ground-level fixtures | Walkways, steps, driveway edges |
| Activity Lighting | Enable comfortable use of functional outdoor zones | Overhead pendants, wall lights, task fixtures | Patio, outdoor kitchen, pool area |
| Atmosphere Lighting | Create visual depth, drama, and emotional presence | Uplights, accent spots, RGB colour fixtures, strips | Garden, trees, water features, facades |
A single light source, regardless of its quality, produces one type of illumination: even, flat, and without depth. The human eye reads depth and dimension through contrast, through the interplay of lighter and darker zones, and through the sense that different surfaces and planes are responding to light differently. A layered outdoor lighting scheme creates that contrast intentionally. It produces an exterior that the eye finds interesting to look at, that draws attention to the right things, and that creates a genuine sense of arrival and atmosphere.
The practical benefit of layering is equally significant. A scheme with four light sources at moderate output distributed purposefully across a space provides better coverage, fewer dark zones, and less glare than a single high-output source attempting to do everything. More light is not better light. Placed light is better light.
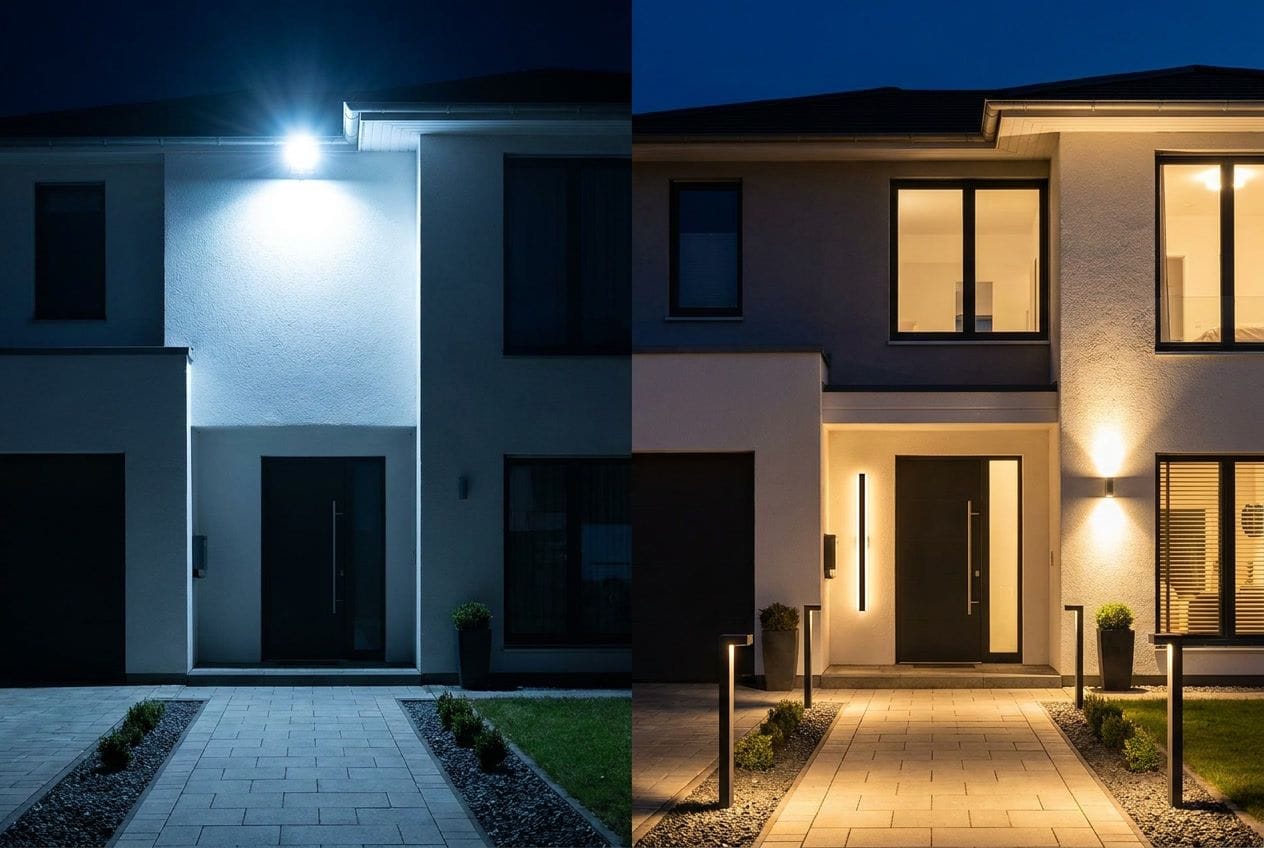
Every successful outdoor lighting plan we have seen, from modest residential gardens to resort-scale exterior schemes, organises its light sources into four functional categories. We call this the MOD Outdoor Lighting Layering Method, and it gives homeowners the same structured thinking that professional designers use.
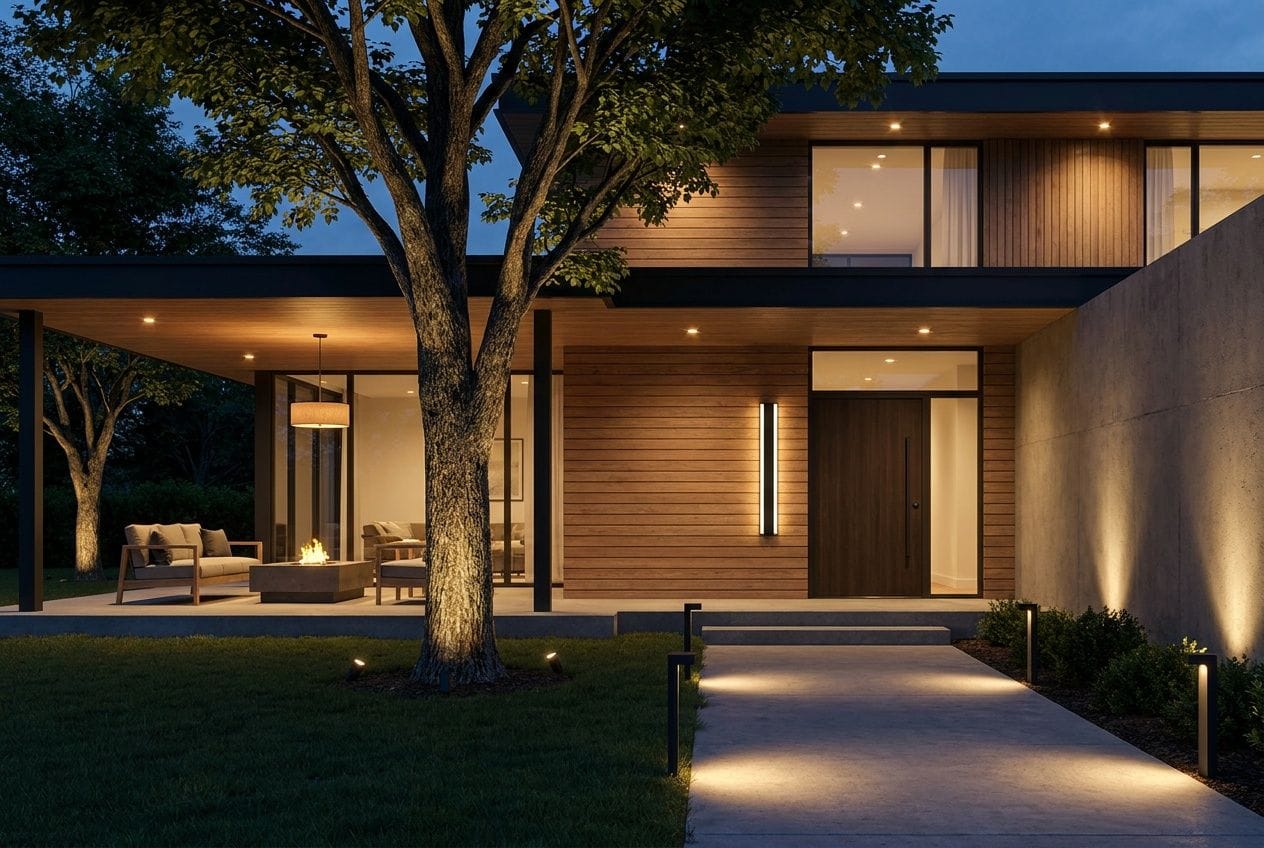
Arrival lighting signals the entrance of the home. Its purpose is to be visible from a distance, to mark the threshold clearly, and to communicate something about the character of the property before a visitor has reached the front door. This is the layer that makes the most immediate impression, and it deserves the most considered fixture choice.
The Haylen wall sconce is the strongest arrival light in the MOD range. Its slim, architectural profile and three adjustable colour temperatures allow it to frame an entrance with precision, running warm for evening atmosphere and adjusting for security use when needed. For a more expressive arrival statement, Terri brings a sleek polished-black sconce silhouette that works equally well flanking a front door or marking the entrance to a covered porch.
Navigation lighting guides safe movement through the outdoor space. Steps, level changes, path edges, and driveway margins all require light that is directional, consistent, and positioned at a height and angle that illuminates the surface without creating glare. This layer is often treated as a functional afterthought, which is where most exterior schemes fail their users most directly.
Meadow path lights provide the structured, ground-level rhythm that navigation lighting requires. Low-profile and weatherproof, they establish consistent spacing along walkways and driveway edges. For steps and raised transitions, Chaz recessed step and ground lights embed into risers and garden edges, casting a directed downward glow that illuminates precisely where it is needed without bleeding into the surrounding scheme. For properties where wiring is not practical, Skye solar path lights deliver reliable performance with no installation complexity.
Activity lighting enables comfortable use of outdoor living areas. A patio where dinner is served, an outdoor kitchen where food is prepared, a pool deck where guests gather: all require light that is warm enough to feel relaxed, bright enough for the activity, and controllable enough to shift between functional and atmospheric as the evening progresses.
Harper, with its geometric LED profile and IP65 waterproof rating, suits the activity lighting layer on patios and entertaining areas where a wall-mounted source needs to cover a defined zone effectively. Vetra brings a tall, vertical LED band that works well on pergola posts or outdoor kitchen walls, providing soft even illumination across an activity zone. Brook, with its minimal profile and clean black finish, complements contemporary outdoor dining areas where the fixture should be present but not prominent.
Atmosphere lighting exists to make the outdoor space beautiful at night rather than merely visible. It is the layer that professional designers spend most of their creative attention on and the one that most homeowners omit entirely. An uplight beneath a specimen tree, a directed beam along a textured stone wall, a colour-capable fixture that can shift the mood of the patio for an event: these additions cost relatively little and contribute the most to how the exterior feels after dark.
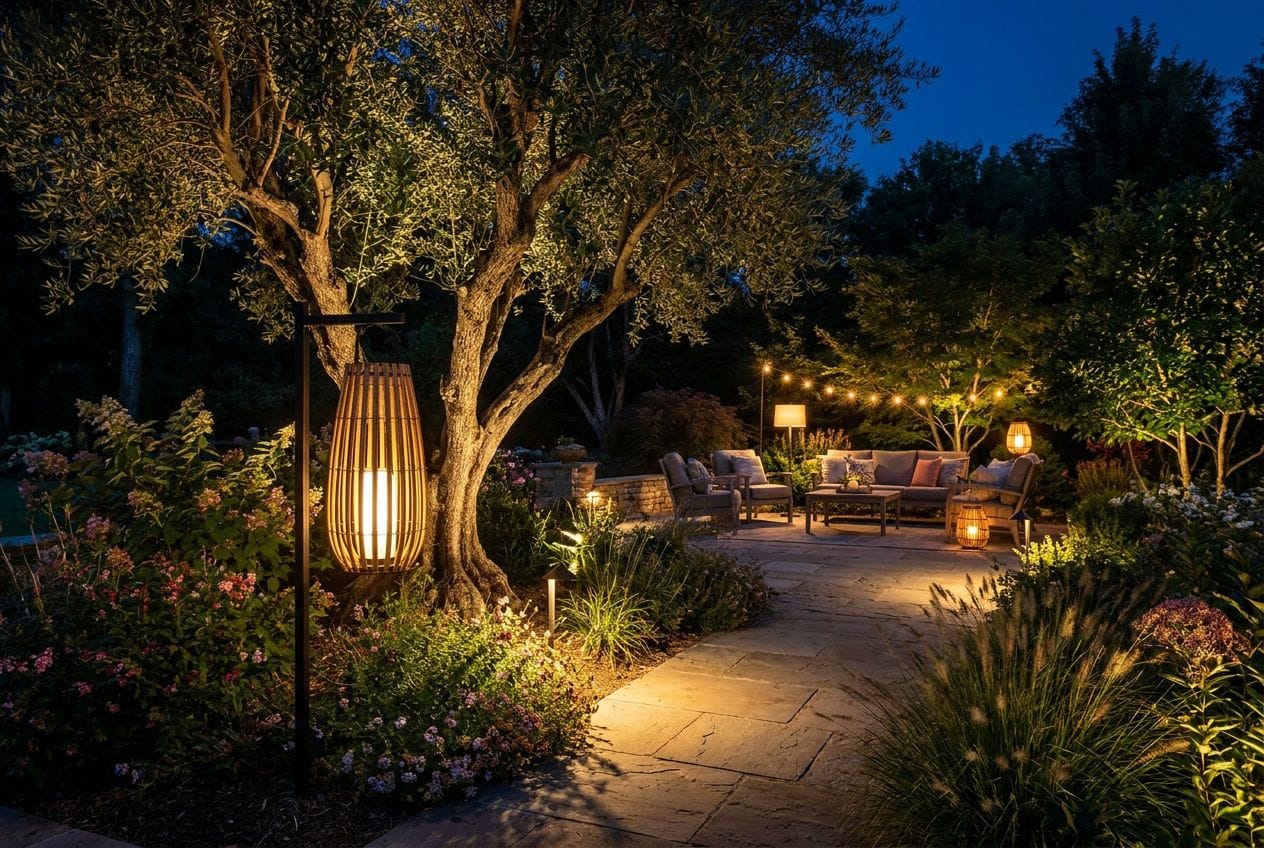
Haylen RGB is the strongest atmosphere fixture in the MOD outdoor range. With seven single colours and 358 dynamic effects, all remote-controlled, it enables the kind of scene-setting that resort properties use to make outdoor spaces memorable. For a warmer, more restrained atmosphere layer, Beam lantern-style post lights cast patterned shadows across nearby walls and garden beds, adding the movement and dimension that flat illumination cannot produce.
Find fixtures for all four layers: browse the MOD outdoor lighting collection for wall sconces, path lights, activity fixtures, and atmosphere pieces.
The front entrance is where the MOD Outdoor Lighting Layering Method is most visible in its effect. Every layer is present within a compact area, and the quality of the overall composition is immediately readable from the street.
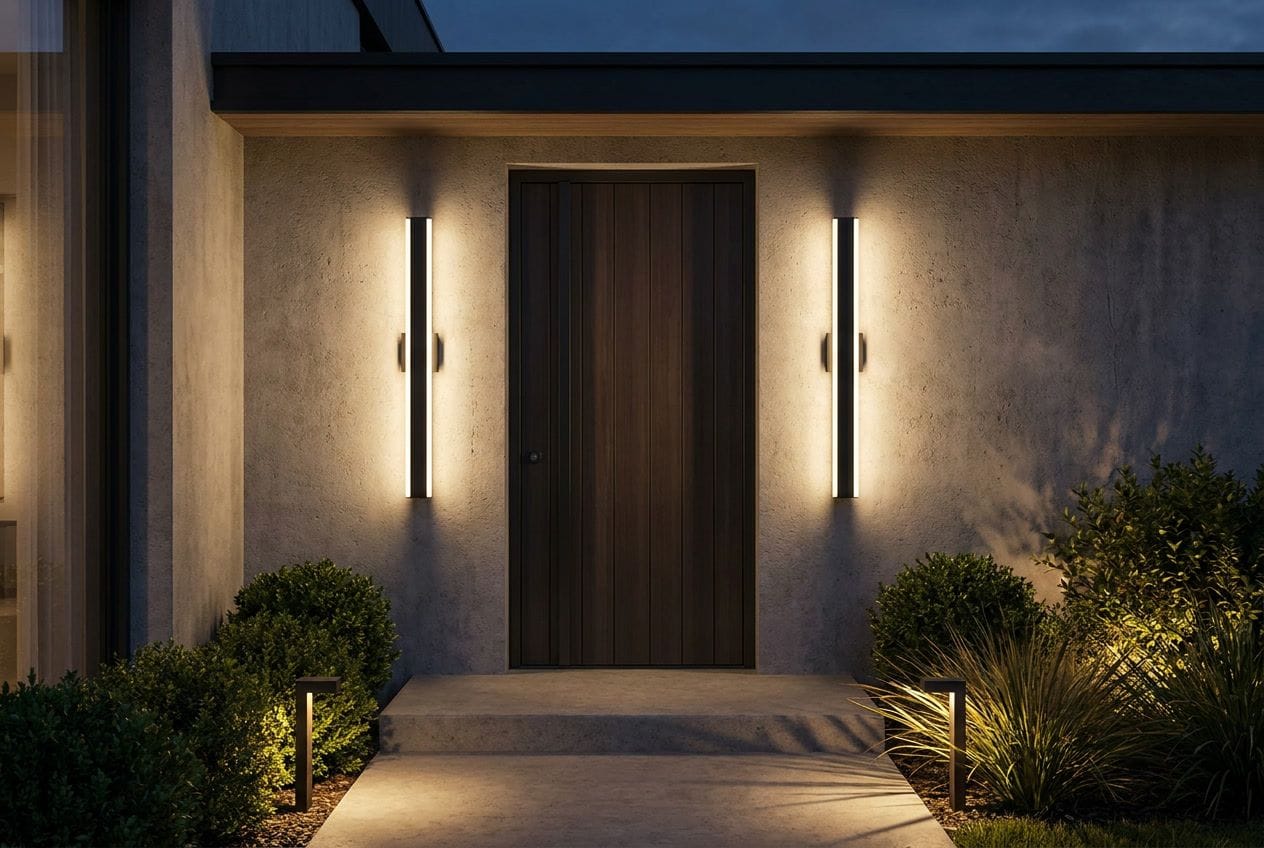
The governing principle for the entrance is that the arrival layer should be the most prominent and the other layers should support it rather than compete with it. Navigation lighting at ground level should be noticeably lower in output than the door flanking sconces; atmosphere accents should be subtle. Hierarchy creates the sense of a designed scheme.
A patio used for dining and entertaining has a wider range of lighting needs than any other outdoor zone. It needs to be bright enough for conversation and dining in the early evening, warm and atmospheric by mid-evening, and capable of shifting mood entirely for specific occasions. A single overhead source provides one version of the patio. The MOD layering method provides all of them.
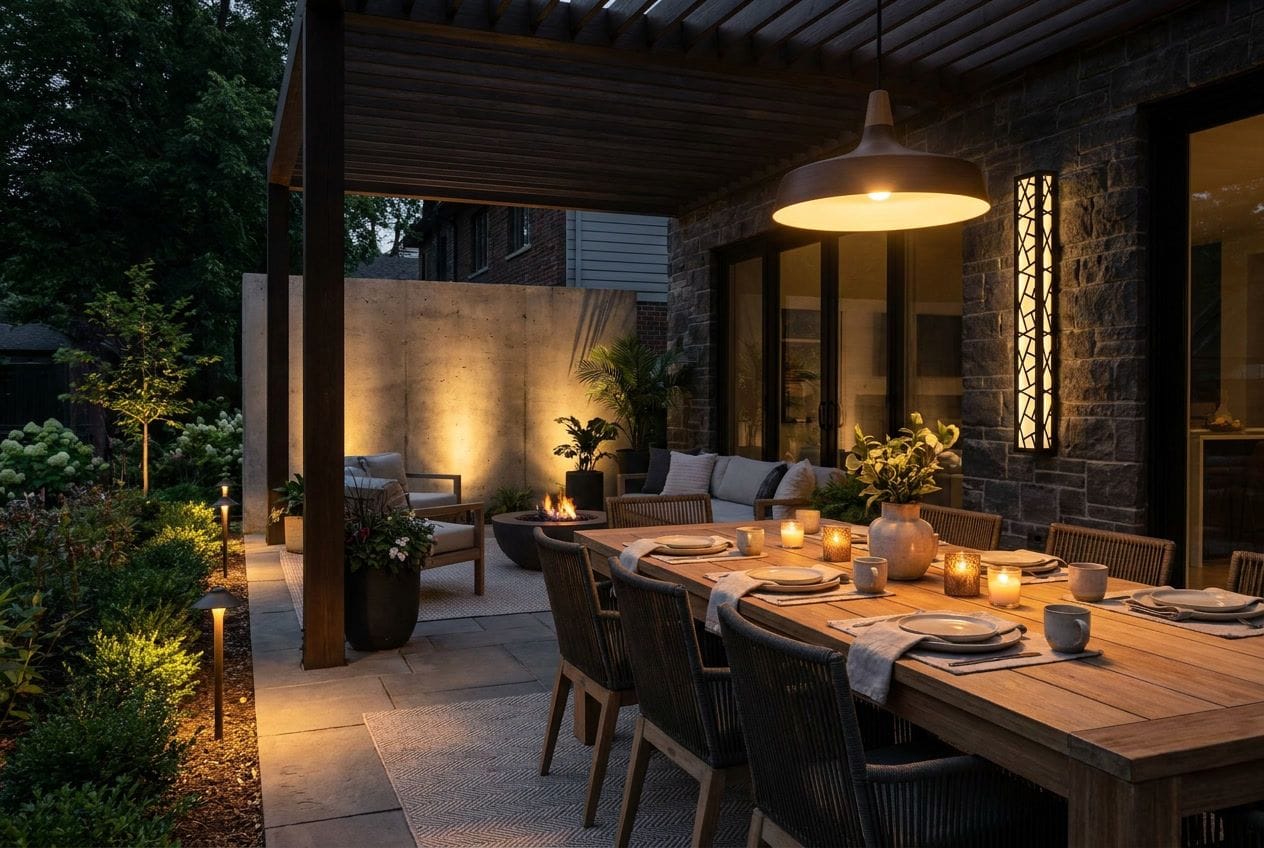
The patio is the zone where atmosphere lighting delivers its clearest return. A Haylen RGB set to a warm, low amber scene for an outdoor dinner creates a quality of light that a fixed-colour fixture simply cannot match. Configuring several scenes in advance, and using a remote to shift between them as the evening progresses, is how a patio becomes genuinely versatile as an outdoor room.
For more on how to approach patio lighting as a design exercise, browse our patio lighting ideas for real examples across different patio scales and styles.
A larger backyard benefits from treating distinct zones within it as separate micro-schemes, each with its own layering, while maintaining a consistent finish and colour temperature across all fixtures. The seating area, the garden, the lawn edge, and any planting features all have different lighting requirements.
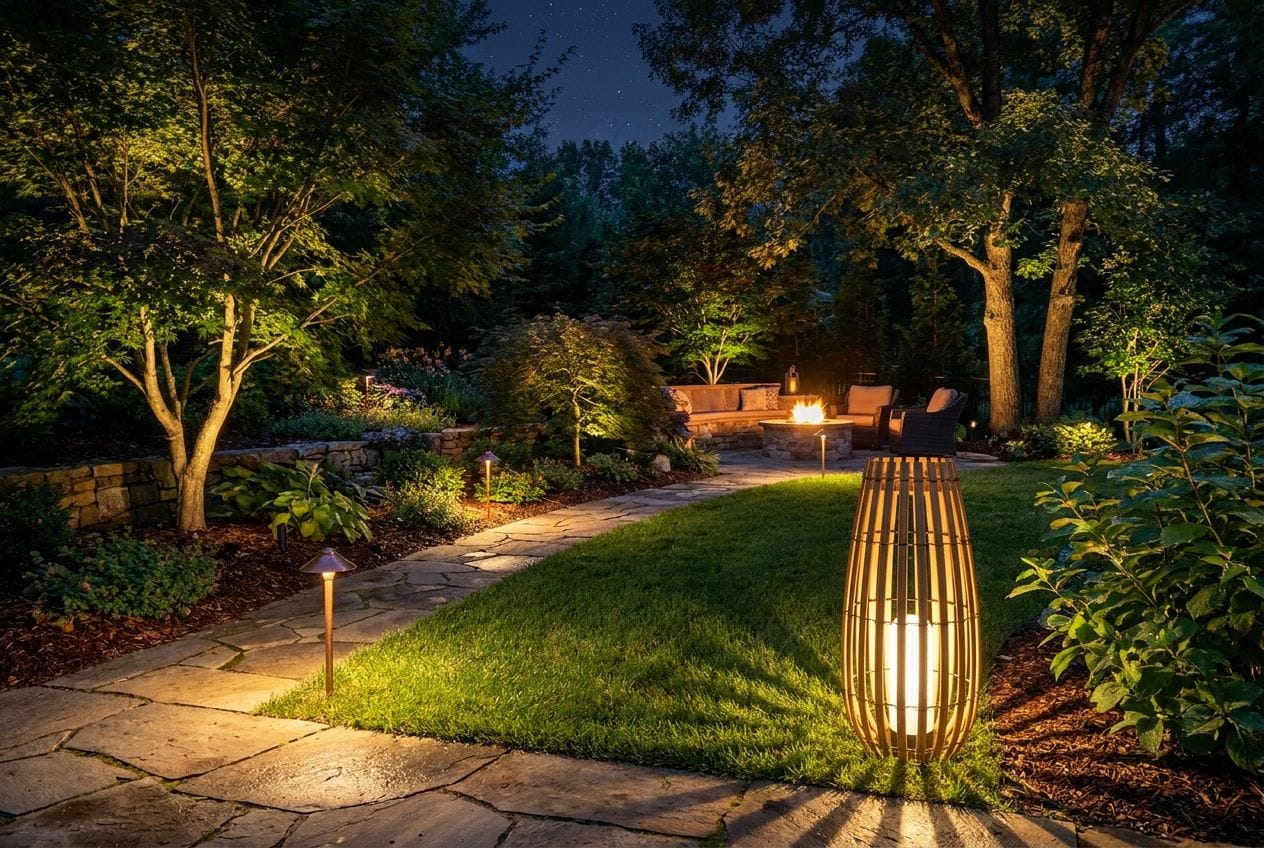
In a large backyard, the absence of navigation lighting between zones creates the dark zones that make the space feel incomplete at night. Even very low-output path markers at the edges of the garden route close those gaps and make the full outdoor area feel intentional and usable rather than half-lit.
Pool surrounds require careful attention to both safety and atmosphere. The pool deck must be clearly navigable after dark; the water itself often has integrated pool lighting; and the surrounding area needs to be atmospheric enough to make the pool zone feel like a destination rather than a utility.
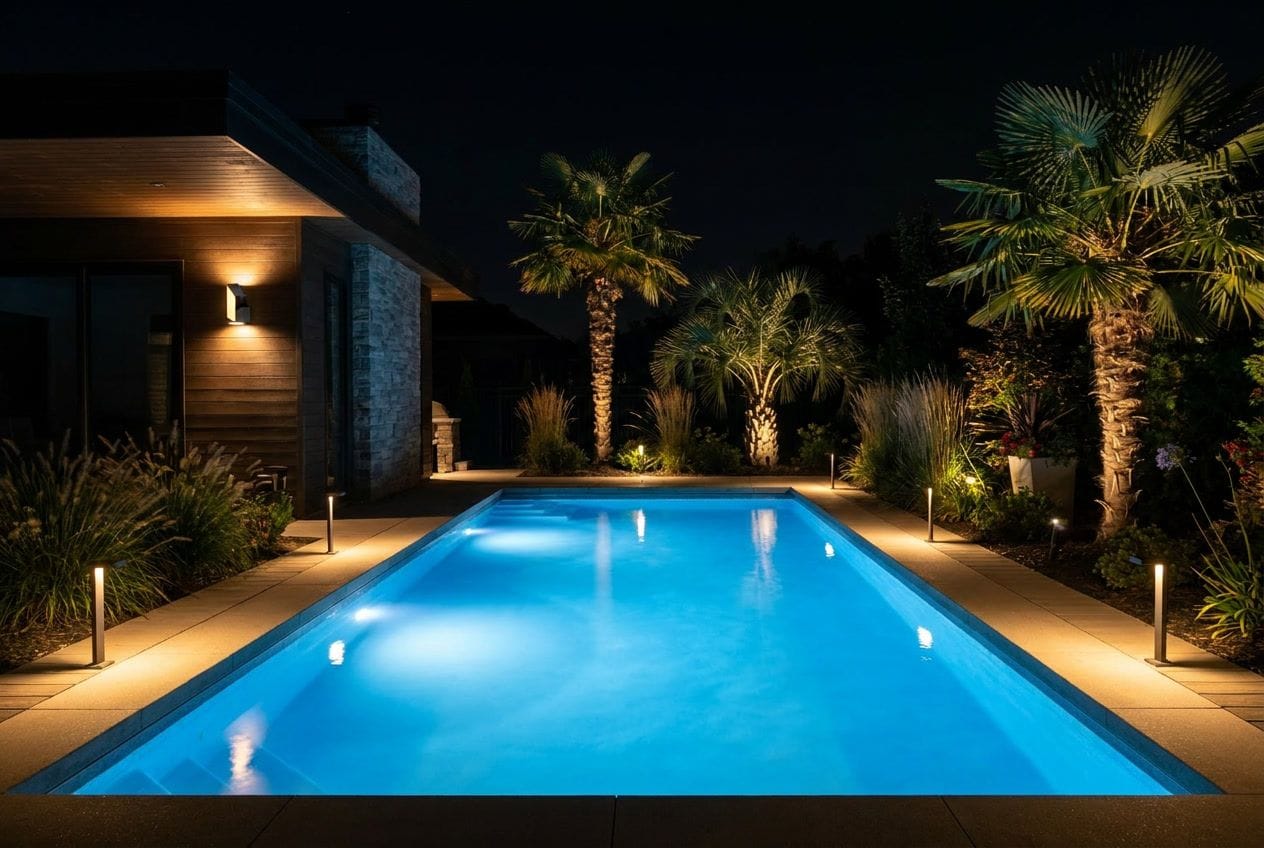
Safety is the non-negotiable priority at a pool surround. Every level change between the pool coping and the deck, every step between the deck and the garden level, and every approach to the water edge must be clearly lit at a level that is visible even when the eye has adjusted to a darker overall scheme. Navigation lighting at a pool is not decorative: it is essential infrastructure.
There is a paradox at the centre of most residential outdoor lighting: the more light is added, the less atmosphere it creates. This seems counterintuitive, and it explains why so many homeowners add fixture after fixture and still feel that something is missing in the exterior after dark.
The problem is not insufficient brightness. It is uniform brightness. When every zone of the exterior is lit to a similar level, the eye has no visual hierarchy to follow. There is no focal point, no depth, no sense that the lighting has been placed rather than simply installed. The result is a home that is technically illuminated and experientially flat.
The five specific failures that account for the majority of poor outdoor lighting outcomes are: relying on a single layer of light rather than building a scheme with distinct categories; selecting output levels that are too high for the zones being illuminated; placing fixtures for installation convenience rather than light quality; creating glare by positioning sources at or above eye level without shielding; and treating all exterior zones as equally important rather than establishing a visual hierarchy that draws the eye where it should go.
The most expensive homes in the world often use less light than their neighbours, not more. They use precisely directed light at moderate output, distributed across multiple layers and multiple heights, with clear hierarchy between the arrival focal points and the supporting navigation and atmosphere layers. The result reads as luxury because it reflects the same principles of restraint and intention that luxury interiors apply.
Guests at luxury hotels remember the outdoor spaces, often more vividly than the rooms themselves. The pool deck at dusk, the garden path to the restaurant, the approach to the entrance: these are the moments that define the experience of a property. All of them are the product of deliberate, layered outdoor lighting.
Resort designers work from one governing principle: light the journey, not just the destination. Every transition between zones is lit carefully, because the experience of moving through a well-designed outdoor space is cumulative. Path lighting guides the guest; arrival lighting marks each destination; activity lighting makes each space usable and comfortable; and atmosphere lighting gives every zone an emotional quality that is remembered long after the functional details have faded.
The vertical distribution of light is one of the most consistent principles in resort outdoor design. Ground-level sources, mid-height wall fixtures, and overhead canopy or tree-mounted sources all activate at different visual planes simultaneously, creating a layered environment that has genuine depth. Most residential exteriors are lit from one height only, which is why they look complete but do not feel immersive.
These principles are not reserved for resort budgets. The MOD Outdoor Lighting Layering Method applies the same logic to residential exteriors at any scale. The starting point is always the same: identify the layers, assign each one a clear purpose, specify fixtures that serve those purposes, and then place them with the precision that transforms a collection of light sources into a designed outdoor environment.
Build your layered outdoor scheme from a curated range: explore the full MOD outdoor lighting collection.
Every layer of the MOD Outdoor Lighting Layering Method serves both a functional and an aesthetic purpose. Navigation lighting makes paths safe and creates visual rhythm. Activity lighting enables outdoor dining and adds warmth to the seating zone. Arrival lighting marks the entrance and defines the character of the property. Atmosphere lighting creates drama and depth and makes the exterior memorable.
The practical application of balance is in output calibration. Navigation lights should be visible at ground level but not so bright that they draw the eye away from the arrival focal points. Atmosphere fixtures should be subtle enough that their effect is noticed before their source is identified. Activity lights should be dimmable so they can serve a functional level during active use and a lower, more atmospheric level during relaxed evening hours.
The balance is achieved through the relationship between layers, not through the calibration of any single fixture in isolation. A beautifully chosen wall sconce at full brightness in a scheme with no other light sources will always look harsh. The same sconce at 60 percent output, with navigation lights at ground level and an atmosphere fixture accent nearby, becomes the centrepiece of a considered composition.
The most widespread mistake and the root cause of most flat, uninspired outdoor schemes. A single type of light source, however well-chosen, cannot produce depth, hierarchy, or atmosphere. Begin the planning process by assigning light sources to at least two of the four layers before selecting any individual fixture.
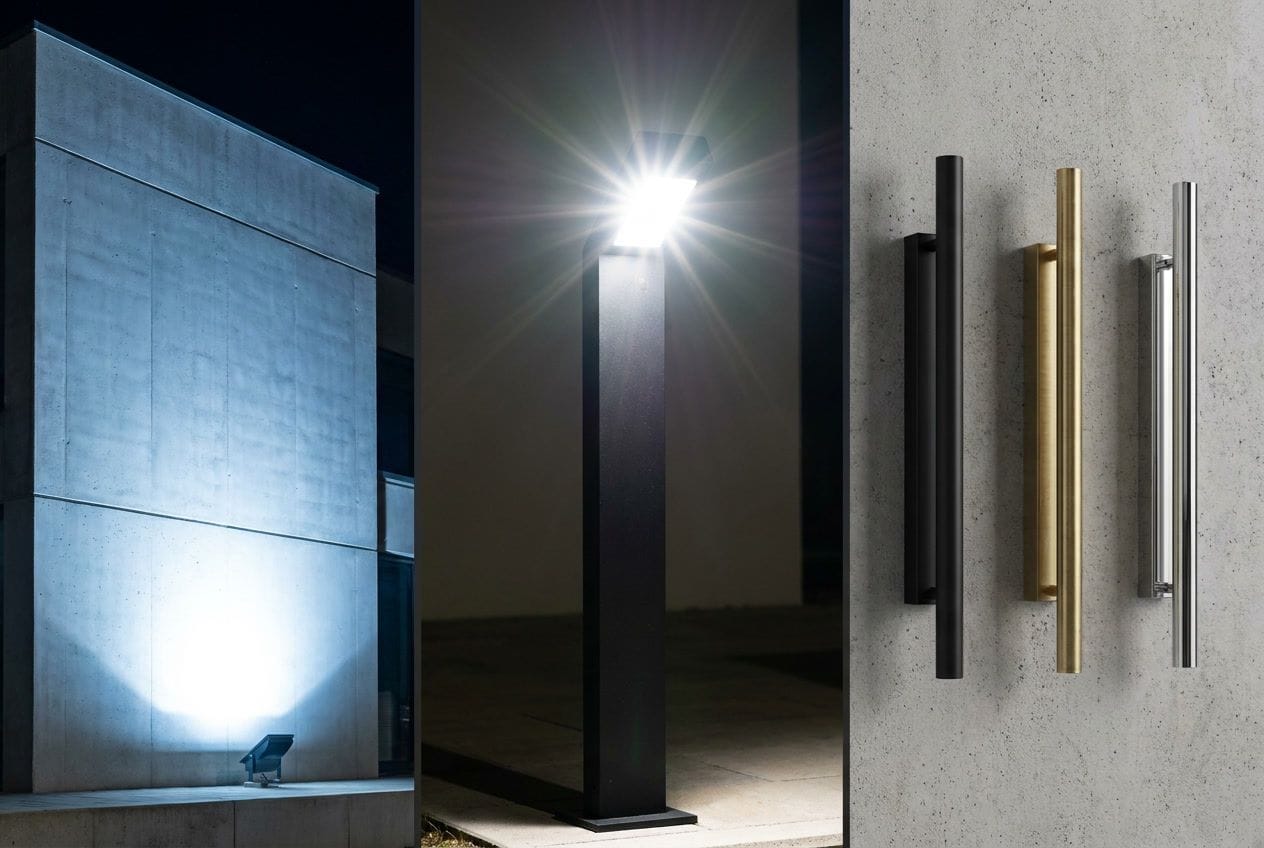
High-output fixtures create glare, eliminate shadow (and therefore depth), and make outdoor spaces feel institutional rather than atmospheric. Restraint in output is not a cost-saving measure: it is a design principle. If a zone feels too dark after applying appropriately calibrated fixtures, add another source rather than increasing the output of the existing one.
Path and step lights should direct light downward onto the surface being navigated. A path light that faces upward or outward at eye level creates glare that actually reduces visibility rather than improving it. Check the beam direction of any navigation fixture before installation and confirm that the light lands on the path surface.
A warm wall sconce alongside a cool-white path light in the same zone creates a visual inconsistency that is difficult to identify but immediately felt. Confirm that all fixtures in a given zone are within the same colour temperature range, ideally 2700K to 3000K throughout the residential exterior.
A scheme with consistent layer planning but inconsistent finish across fixture types reads as a collection of individual purchases. Choose a primary outdoor finish and apply it across all four layers: wall sconces, path lights, activity fixtures, and atmosphere pieces. Consistency in finish is what makes a multi-fixture scheme read as a single designed outdoor lighting plan.
Work through this list before placing any orders. A confident answer to every item means the scheme is well-planned and the fixtures are matched to their intended layers.
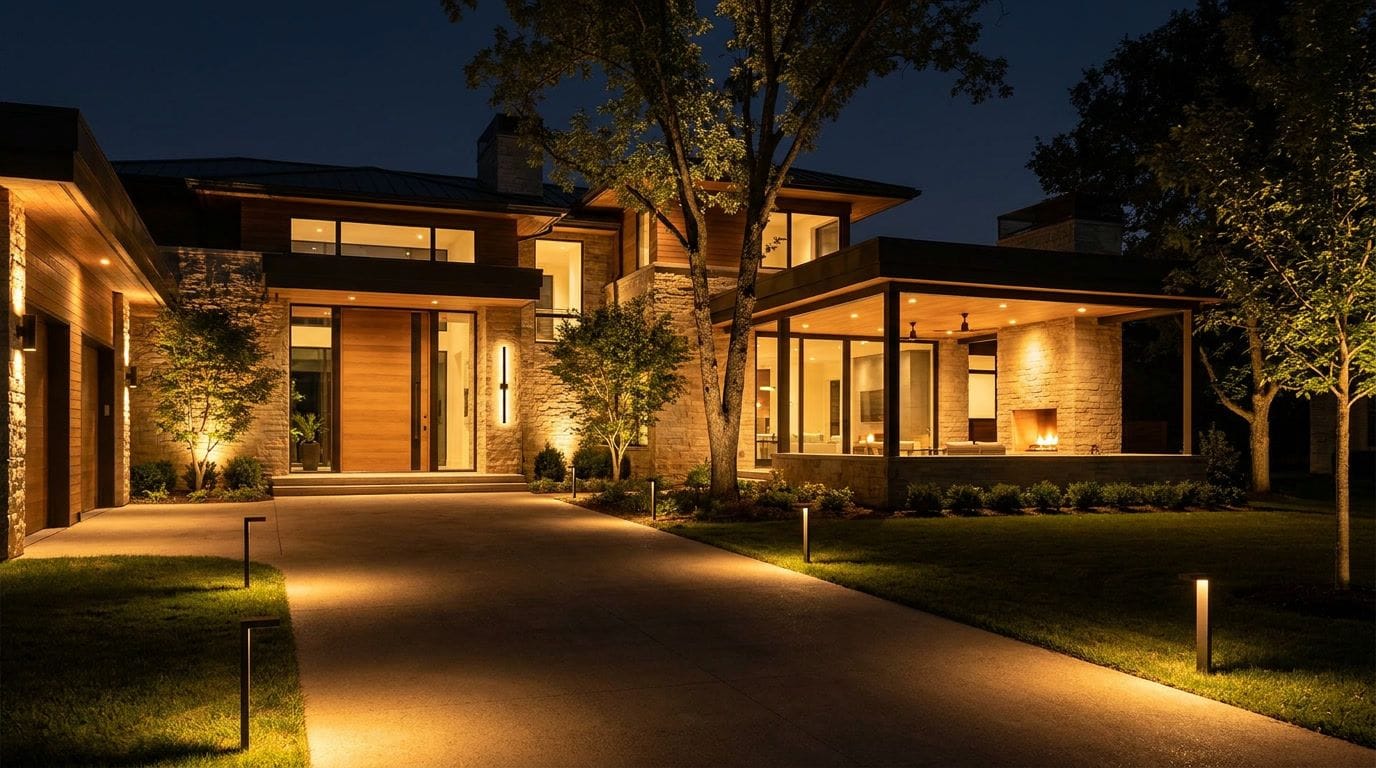
Layered outdoor lighting is not a complicated technique. It is a way of organising a decision that most homeowners approach randomly into a structured sequence with a clear logic. Identify the zones, assign the layers, select fixtures that serve their specific purpose in each layer, and place them with precision. The result is an exterior that works as well after dark as it does in daylight, and that produces the atmosphere that the interior design of the home deserves to be supported by outdoors.
The MOD Outdoor Lighting Layering Method applies to every scale of property and every budget. The quality of the outcome is determined by the clarity of the plan, not by the cost of the fixtures.
For inspiration before committing to a plan, browse our outdoor lighting ideas and patio lighting ideas for real examples of layered schemes at different scales. When your plan is ready, explore the full MOD outdoor lighting collection to find the right fixtures for each layer.
Phone Monday to Friday, 9 AM to 8 PM ET. Chat 7 days a week.
The MOD Outdoor Lighting Layering Method organises outdoor lighting into arrival lighting (marking the entrance), navigation lighting (guiding safe movement), activity lighting (enabling comfortable use of functional zones), and atmosphere lighting (creating visual depth and emotional presence). Every successful outdoor scheme uses at least two of these layers in each primary zone.